Introduction
Photo editing can easily become the most time‑consuming part of photography and content creation. You take great photos, but then spend hours adjusting exposure, colors, highlights, and tones one image at a time. This is frustrating, especially if you edit photos regularly for clients, social media, or personal projects.
Lightroom presets solve this exact problem. They allow you to apply a complete editing style to your photos in one click, saving time while keeping your images consistent. Whether you are a photographer, content creator, or business owner, presets help you work faster without sacrificing quality.
In this guide, you will learn how to edit photos faster using Lightroom presets, how they actually work, and how to use them the smart way for professional results.
What Lightroom Presets Really Are
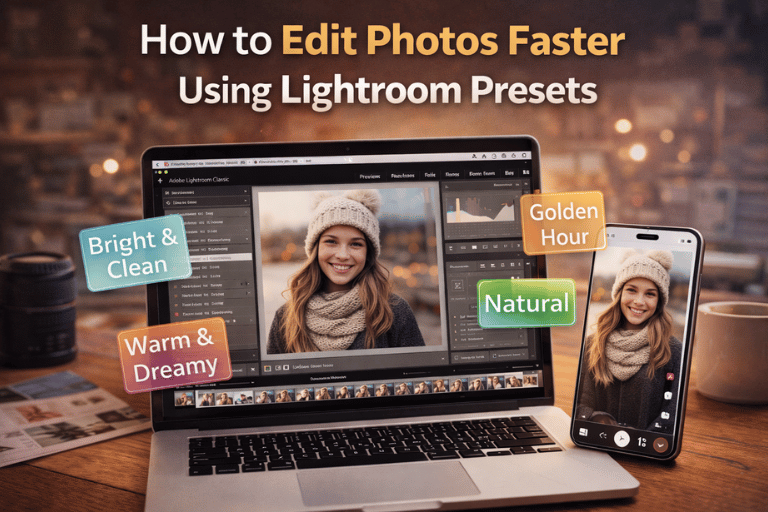
A Lightroom preset is a saved group of editing settings.
It includes adjustments like exposure, contrast, highlights, shadows, color grading, and tone curves.
Instead of editing every photo manually, you apply a preset and then make small tweaks if needed.
Think of presets as a starting point, not a final edit.
Why Manual Editing Slows You Down
Manual editing takes time because you repeat the same steps.
You adjust brightness. Then contrast. Then colors. Then shadows. Again and again.
When editing dozens or hundreds of photos, this repetition becomes exhausting.
Presets remove this repetition and give you consistency instantly.
How Lightroom Presets Speed Up Your Workflow
Presets work because they automate your most common edits.
You apply one preset, and most of the work is already done.
Instead of starting from zero, you start from 70 to 80 percent finished.
This alone can cut editing time by more than half.
Step‑by‑Step: Editing Photos Faster With Presets
Here is a simple workflow you can follow.
Step 1: Import Your Photos
Import your images into Lightroom as usual.
Group similar photos together. Presets work best when lighting and conditions are similar.
Step 2: Choose the Right Preset
Select a preset that matches your photo style.
For example, use:
- Bright presets for lifestyle photos
- Moody presets for portraits
- Clean presets for product photos
Apply the preset with one click.
Step 3: Make Small Adjustments
After applying the preset, adjust only what is necessary.
Usually this means exposure or white balance.
Avoid over‑editing. Presets are designed to do most of the work.
Step 4: Sync Presets Across Photos
This is where the real speed comes in.
Once one photo looks good, sync the same preset and settings to similar photos.
You can edit dozens of images in seconds.
Why Consistency Matters in Photo Editing
Consistency builds trust and professionalism.
Whether you are posting on Instagram or delivering photos to clients, a consistent look feels polished.
Presets help maintain that look across all your images without extra effort.
Lightroom Presets for Different Use Cases
Different creators use presets for different reasons.
Photography
Photographers use presets to maintain a signature style.
Wedding, portrait, and travel photographers rely heavily on presets.
Social Media Content
Creators use presets to keep feeds visually consistent.
This is especially useful for Instagram and Pinterest.
If you also create visual content, you may find value in social media design tools mentioned in our guide on Canva templates that sell online.
Product and Brand Photos
Businesses use presets to keep product photos clean and professional.
This improves brand recognition and trust.
Mobile Editing With Lightroom Presets
Lightroom presets work on mobile too.
You can edit photos directly on your phone using the Lightroom mobile app.
This is perfect for creators who work on the go.
The workflow is simple and fast, even without a computer.
Common Mistakes When Using Presets
Presets save time, but only if used correctly.
Avoid these mistakes:
- Applying the wrong preset to the wrong photo
- Over‑adjusting after applying a preset
- Using too many different presets in one project
- Ignoring lighting differences
Fixing these mistakes instantly improves results.
Free vs Premium Lightroom Presets
Free presets can be useful for testing.
However, premium presets are usually better optimized and more consistent.
They are designed for real‑world lighting conditions and professional workflows.
Many creators prefer premium presets because they save more time long term.
Using Presets as a Business Tool
Presets are not just for speed.
They help you deliver faster, maintain quality, and scale your work.
If you sell digital products, presets can also be bundled and sold as downloadable assets.
You can explore professionally curated digital assets on Pixbundle that help creators save time and work smarter.
FAQs
Do Lightroom presets really save time
Yes. They reduce repetitive editing and speed up your workflow significantly.
Are presets one‑click solutions
Mostly, but small adjustments may still be needed depending on lighting.
Can beginners use Lightroom presets
Yes. Presets are beginner friendly and easy to apply.
Do presets work on all photos
Presets work best on photos with similar lighting and exposure.
Are Lightroom mobile presets different
No. They work similarly on mobile and desktop.
Can I create my own presets
Yes. You can save your favorite edits as custom presets.
Do presets reduce photo quality
No. They only adjust settings and do not damage image quality.
Are presets allowed for client work
Yes. Many professionals use presets daily for client projects.
How many presets should I use
Stick to a small set to keep your style consistent.
Conclusion
Editing photos does not have to be slow or stressful.
Lightroom presets help you edit faster, stay consistent, and focus more on creativity instead of sliders.
Whether you are a photographer, creator, or business owner, presets are one of the easiest ways to improve your workflow.
If you want to save time with ready‑to‑use digital assets, explore Pixbundle for curated tools designed to help creators work smarter.
Visit Pixbundle and start building a faster workflow today.
Leave a Reply